Kids and Summer – and Peanut Butter Bars

Easy Peanut Butter Bars

About a month ago, I was so concerned with what I was going to do since summer was coming.  See, my older little boy is in preschool and it was letting out for 2 months.  It is hard to take two preschoolers with me anywhere, and I had grown accustomed to getting things done in the morning with just one of them.

And here, almost July, and we have one more month. A month filled with fruit picking, zoo trips, play dates, and vacation to North Carolina.  It hasn’t been as tough as I thought, but my husband has been gracious with his time off, too.

At the beginning of the week I wanted to bake something and get my older preschooler in the kitchen.  He really loves being in the kitchen with me and I love it.  So, we opened a cookbook, made a few tweaks with what we had, and put them in the oven.

The next day we got to head to Roswell and go hiking and playing in the water at Vickery Creek Falls.  So fun.  My boys are definitely water lovers and they love any time they get to spend with their daddy.  These bars were delicious and portable and had some good energy boosting carbs in them to refuel them after the hike.

Easy Peanut Butter Bars
Author: 
Recipe type: Bar
Cuisine: Dessert
Prep time: 
Cook time: 
Total time: 
Serves: 20
 
Easy, portable, not-to-sweet peanut butter bar
Ingredients
  • ½ cup unsalted butter, softened
  • ½ cup sugar
  • ½ cup packed brown sugar
  • 1 egg (room temp)
  • 1 tsp vanilla
  • 1 cup all-purpose flour
  • ¼ tsp kosher salt
  • ½ cup rolled oats
  • ½ cup roasted peanuts (halved)
  • ¾ cup chocolate chunks (I used dark)
  • ½ cup 10x sugar
  • 1½ T creamy peanut butter
  • 2 T milk (or until desired glaze consistency)
Instructions
  1. Cream first ingredients (through vanilla).
  2. While you let the mixer do its work, get a 9x13 pan, line with foil, spray with cooking spray, and set oven to 350.
  3. Combine dry ingredients and mix with sugar mixture.
  4. Fold in chips and nuts.
  5. Press into pan and bake for 20-25 minutes.
  6. When done, let cool in pan for 5-10 minutes.
  7. Take the bars out (made easier with the help of the foil) and put on cooling rack.
  8. Mix glaze and drizzle over the bars.
  9. Let cool completely then cut into squares.
These were easy to assemble and tasted great and have lasted well throughout the week.

Sandwiches & Hummus: the Perfect Pair

posted in: food | 0

This post was sponsored by The Women Bloggers, LLC and #SoapBoxInfluence. Special thanks to the Kendal King Group, creators of Bush’s #HummusMadeEasy Campaign. All opinions are my own.
I love sandwiches.  I mean, what’s not to love?

I grew up on white, butter, potato, or onion roll bread.  Now I’m on to wheat, harvest grain, sourdough, or focaccia – or a baguette, garlic bread, cornbread.  Is there really a bad bread – and we haven’t even touched the sweet breads yet!

Then, you add peanut butter and honey, banana and mayo, tomato and mayo and bacon, pimiento cheese, 5 cheese grilled cheese, peanut butter and jelly.  Or turkey and provolone, ham and swiss, blt, avocado and bacon to just about anything.

Then you have mayonnaise, mustard, relish, pickles, chips (especially bbq or doritos), salt and pepper…all the condiments.  And enter hummus.  Oh, yes, hummus.

I may have grown up on a simple grilled cheese or peanut butter and jelly – not organic or natural – just plain old peanut butter and jelly.  But, as I’ve matured, my taste in sandwiches have matured as well.  Don’t get me wrong, when I want a taste of my childhood, I still grab a tomato and mayo or peanut butter and honey with banana sandwich and it takes me right back to the orange groves and muscadines and strawberry fields of central Florida.

But, I do like to kick my sandwiches up a little, and as a mom, I need them still to be quick.  And healthy.  Bush’s Hummus Made Easy helps me be quick, easy, and a killer sandwich maker.

You may know Bush’s for their baked beans, and believe me, they are stellar for bbqs.  But, now, Bush’s makes a hummus that is super quick, cheap, and healthy – and adds a pack of flavor to any sandwich.

I used all three of their flavor profiles to add great touches to my sandwiches.

Perfectly gooey grilled cheese


I used the southwest black bean hummus to add protein and spice to a Mexican grilled cheese.  Just spread some of the hummus on the inside piece of bread (I used a good sourdough), then top with any mexican cheeses that you want – grill your grilled cheese as normal.

Simple and cool pita perfect for summer months


I used the roasted red pepper to make a vegetarian Greek pita.  Just spread on the hummus on the inside of a warmed pita: and stack it full of cucumbers, red onions, tomatoes, and feta – all marinated in a greek dressing of your choice.  Super good, and light – perfect for the summer months.

Bacon and hummus make a great pair

And I used the classic hummus for a tasty turkey and bacon sandwich.  I used a regular whole wheat, added hummus, cheese, turkey and of course bacon.

This hummus, found at Wal-Mart next to the Bush’s Beans, is made with simple ingredients and absolutely no artificial preservatives. And while I love to make my own hummus, this is a simple, quick, and healthy alternative when I need a quick sandwich spread, appetizer, or snack


The Perfect Tuna Salad

Tuna salad can be a go-to lunch any day of the week!

One of the pieces of marital advice I give every newly engaged girl I know is simply this: Love God, Love your mister, and study both.

When you love God first, loving others becomes easier (not easy, just easier).

Love your mister – I’m assuming if you are going to marry him you already do.

Study both. The more you get to know God’s character and dwelling on the Gospel, the more you will actively live our the gospel.  Which every marriage needs.  And then when you study your mister – not memorizing every book and trying to make your mister into that person in the marriage book – you are well on your way to success in marriage.


Now, how does that marriage advice apply to tuna salad?

Well, my mister loves tuna melts and getting his tuna salad perfect has taken me almost 5 years.  So, when he tasted this the other day – I got a two thumbs up and don’t change a thing look – and he ate it all!

This tuna salad is also vertatile.  You can have a low carb lunch by putting it into a avocado half.  This is a delicious combination.  You can toast some bread, melt some cheese on top, and have a traditional tuna melt.  You can put it atop some greens for a salad.  You can eat it with whole grain crackers for a lighter lunch.  Or just eat it with a spoon.

The Perfect Tuna Salad
Author: 
Recipe type: Seafood
Cuisine: Southern
Prep time: 
Cook time: 
Total time: 
Serves: 4-6
 
A perfect tuna salad is great for parties, light lunches, or salads.
Ingredients
  • 2 cans whole chunk white albacore tuna in water (the quality of tuna is so important)
  • ¼ cup Duke's mayo and 1 T
  • 1 tsp dijon mustard
  • 3 hardboiled eggs (the cooking time for the recipe is all in the boiling of the eggs)
  • ½ tsp each of kosher salt and black pepper
Instructions
  1. Mix all together.
  2. Eat.
 

Roasted Broccoli and Spinach Frittata

posted in: The Charming South Kitchen | 0


Whoever was the first person to eat brunch or brinner – they were genious.  I love eating breakfast foods at different times of the day – other than breakfast of course.

And if you are trying to watch your carb intake – then this is a perfect recipe for you!

Roasted Broccoli and Spinach Frittata
Author: 
Recipe type: Breakfast
Cuisine: Eggs
Prep time: 
Cook time: 
Total time: 
Serves: 6
 
Eggs and vegetables - great combination
Ingredients
  • 1 head of broccoli, chopped and roasted (in directions below)
  • 1 handful of fresh baby spinach
  • 7 eggs
  • ⅓ cup whole milk plus 2 T whole milk
  • ¾ cup sharp cheddar, grated
  • salt and pepper to taste
  • ½ tsp dijon mustard
Instructions
  1. Before you make the frittata, you have to roast the broccoli. This is my favorite way to eat broccoli. Chop one head of broccoli, using the florets, spread out on a sheet pan. Drizzle with olive oil, red pepper flakes, salt and pepper. Roast at 425 for 20 minutes. Let cool.
  2. Whisk together eggs, milk, spices, and mustard.
  3. Add in vegetables and cheese.
  4. Bake in a pie pan (I have a deep dish one) for 30-35 minutes at 350.
  5. Eat with fruit or other breakfast-y items.


Mexican Lasagna

Mexican Lasagna Casserole

As a mother of two – a preschooler and a toddler – life in my kitchen has gotten really slim.  Meaning – I used to love being in my kitchen.  But, now I’m multi-tasking and keeping an eye on the kids and an eye on the stove – its a wonder I don’t burn dinners and chop off my thumb in the process.

My friend Kristin over at Dine and Dish (you so have to check out her blog for everything) did an enchilada casserole.  I had been trying to make it for two weeks but kept either using an ingredient for something else, or forgetting an ingredient.  So, I just changed the recipe.  Thanks for the inspiration!

And my family loves some Mexican food.  Wait, I love Mexican food.  Therefore, I impose it on my family.  I hope they don’t mind.  This dish took 20 minutes to put together, takes 25 to cook, and it is great for leftovers.  I call that a win – win  – win.  And it is only made better by avocados and more cheese – that has to be a good dish.

Mexican Lasagna
Author: 
Recipe type: Main Dish
Cuisine: Mexican
Prep time: 
Cook time: 
Total time: 
Serves: 8-10
 
Easy layered Mexican lasagna perfect for any time of the year
Ingredients
  • ¾ lb ground chuck (or whatever ground beef or turkey is cheapest)
  • 1 onion, chopped
  • 2 cups black beans (I used dry beans and cooked them down)
  • 1 can whole kernel corn (frozen would work too)
  • juice of half lime
  • 1 14 oz can of diced tomatoes
  • ½ tsp salt
  • 2½ tsp taco seasoning
  • 6-8 flour tortillas, soft taco size
  • 1 bottle green salsa (I used Trader Joes because it is Whole30 compliant)
  • 1 can refried beans (or you can make them yourself)
  • Mexican blend cheese
Instructions
  1. Preheat oven to 350.
  2. Cook the meat until almost done. Add onion and cook until meat is done. Drain. (This is a good tip. You can buy cheaper meat with higher fat - just drain it really good when its done cooking.)
  3. Put the meat and onion mixture back in the pan. Add corn, lime, beans, tomatoes, and seasoning. Let simmer for 3-5 minutes.
  4. Start your lasagna with 2 tortillas in the bottom of a 11x7 pan. Then spread those with ⅓ of the can of refried beans. Then scoop up some meat mixture and layer that on top. Top with cheese then salsa. Then repeat.
  5. I left mine topped with cheese (just because I ran out of tortillas).
  6. Bake at 350 for 25 minutes.
  7. Eat it with a green salad. You can also serve tortilla chips if you want crunchiness and sour cream and more cheese and avocado are a must!
 

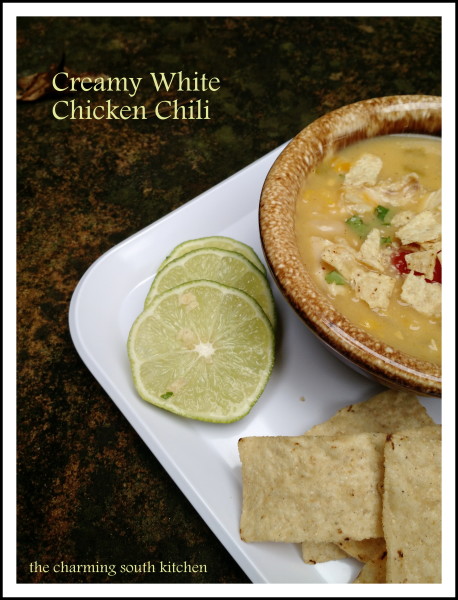
Creamy White Chicken Chili

Creamy White Chicken Chili

This is probably my favorite Fall recipe.  I got it more than 10 years ago, and I finally decided to change it up, write it down, take more pictures, and have it more often.

I got this recipe from friends of mine – so really, food is all about community.  My Mister can tell you how much this is true in my life.  I love cooking for people – if people don’t like what I cook or don’t eat it at all I am really hurt (I know, I gotta get over that), and food is such a comfort for me.  Really the saying is true that everything important happens around the table.  The other night as we were picking out a place to go for our anniversary dinner, I got all mushy as we talked about restaurants.  He definitely knows one of my love languages is food.

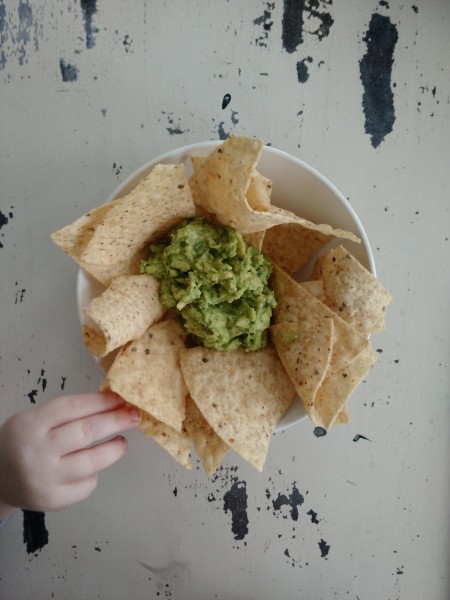
Homemade Guacamole

This is probably one of the first recipes I ever wanted to go on my old food blog.  I always shared it with my college girls that I knew.  It was warm and comforting.  You eat it with a spoon.  You put yummy stuff on top of it to make it better – like cheese, sour cream, bacon, avocados, cilantro – I mean – what could be better.

Creamy White Chicken Chili
Author: 
Recipe type: Soup
Cuisine: Mexican
Prep time: 
Cook time: 
Total time: 
Serves: 6-8
 
Creamy and comforting with a hint of kick - this is a perfect white chicken chili
Ingredients
  • 1 onion, diced
  • olive oil
  • 1-2 garlic cloves, minced
  • 6 cups homemade chicken broth (I don't season mine at all, therefore I can season the soup as a whole)
  • 1 can green chilies (as hot as you might like them), drained
  • 1 can creamed corn
  • 2 cans cream of chicken
  • ⅓ cup whole milk
  • 1 can great northern beans, drained
  • 2½ cups chopped chicken (I cook a whole chicken and chop up the meat and use the broth)
  • 1 tsp each of cumin, chili, ground pepper
  • ¾ tsp kosher salt
  • 1 cup mexican shredded cheese
  • toppings: sour cream, additional cheese, guacamole, bacon, onions, tomatoes, etc
Instructions
  1. In a dutch oven, saute the onion in the olive oil (about 1 T). After about 3 minutes, add the garlic and the chilies.
  2. While that is cooking, mix together the corn, beans, soup, milk, and spices.
  3. Add that and the broth to the pan
  4. Let simmer for about 15 minutes.
  5. Add the chicken and let cook for about 10 more minutes
  6. Add the cheese, stir, and turn off the heat.
  7. Let your husband taste. Oh, wait, that's just for my home.
 

Fall Sweet and Spicy Party Mix

Fall Sweet and Spicy Party Mix

Fall is the perfect time to have snacks.

I mean, there you are, sitting cozily by a roaring fire (or a gas one, or just some pretty candles in your fire place), and you need something to munch on.

Or, you have a bunch of friends over in your backyard for a fire and smores – but you need something to munch on while the smores get perfectly roasted with the charred edges of sticky ooey gooey marshmallow.

Or you have some sports fans over to watch the game and there is an empty coffee table just needing a big bowl of healthy snacks to get every body through the game (or at least until halftime.

Snacks do not have to be bad for you.  I think we often feel that snacks have to be unhealthy to be fun or to taste good – but that is so not the case.  Nuts is on a mission to share recipes that are healthy, fun, and delicious, and will be good for tailgating, watching the games, or just to snack on at night while watching your favorite movie.  And you can get your pumpkin seeds from a pumpkin and do a lot of work, or you can get them delivered to your door.

One of the things my mister always does for me, including this batch, is make the popcorn.  We got some spices for a wedding gift, and have been making a special spicy blend of popcorn a few times a month since we got married almost four years ago.  We took this special Campbell tradition and made it a little sweet too.

Fall Sweet and Spicy Party Mix
Author: 
Recipe type: Snack Mix
Cuisine: Snack
Prep time: 
Cook time: 
Total time: 
Serves: 7 cups
 
Sweet and Spicy and packed with everything you love about Fall.
Ingredients
  • For the popcorn
  • 5 cups of popped popcorn
  • ½ tsp Penzeys Jerk Seasoning (I've learned that all jerk seasoning is not created equal)
  • fresh cracked pepper and popcorn salt to taste
  • For the candied pumpkin seeds:
  • ¾ cup raw pepitas (pumpkin seeds)
  • ½ cup powdered sugar
  • 1 T vodka
  • ¾ tsp cinnamon
  • ¼ ground cloves
  • ¼ nutmeg
  • ⅓ tsp ginger
  • ¼ tsp cardamom
  • ¼ tsp sea salt
  • pinch of cayenne
  • ½ cup white chocolate chips
  • ¾ cup craisins
Instructions
  1. Season the popcorn and let it get cool, but not stale.
  2. For the pumpkin seeds: put everything in a saucepan over medium heat and stir constantly for about 5 minutes, until the liquid is dissolved and the sugar starts to caramelize and the pumpkin seeds pop.
  3. Dump out on to parchment paper-lined cookie sheet.
  4. Spread out.
  5. Let cool.
  6. Break into pieces
  7. Combine popcorn, pumpkin seeds, white chocolate, and craisins all together.
  8. Enjoy.
 

Creamy Roasted Jalapeno Soup

Processed with VSCOcam
 

Creamy Roasted Jalapeno Soup

the charming south kitchen

Fall has (not quite officially) begun,

but when I bring out the old youth group (yay Anastasia) tshirts that I’ve had for some 15 years,

I can make roasted jalapeno soup and call it Fall.

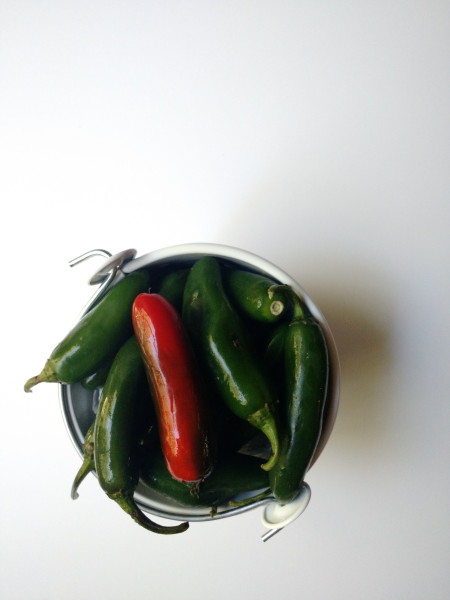
Back in August I attended my family reunion over in Northern Alabama.  Southern cooking and fried chicken and pies and pound cakes are the name of the game.  Woodworking and quilting.  What I also received this year was a giant bag of jalapenos.  Can life really get much better?  Fresh grown jalapenos.  Yes, from people who really know what they are doing in the vegetable garden arena (not me, I kill basil).  What was I going to do with all of these tiny peppers that tasted so good with just a subtle amount of heat?

Make soup of course.  And anything you can put cheese, bacon, and avocado on has got to be a good soup, right?

This has just the right amount of heat.  You may want a glass of milk nearby, but most of you will probably be able to handle it.  I just downed a bowl of it.  My husband will have it tonight alongside a full-loaded baked potato.  Not too shabby for a Monday night.

Creamy Roasted Jalapeno Soup
Author: 
Recipe type: soup
Cuisine: comfort food
Prep time: 
Cook time: 
Total time: 
Serves: 4-6 servings
 
Bit of heat, delciously cream, fresh soup for the start of fall
Ingredients
  • 6 jalapenos, no seeds
  • 5 carrots, diced
  • ½ onion, diced
  • 2 T olive oil
  • ½ tsp garlic powder
  • 2½ cup chicken broth (homemade is best so you control the ingredients)
  • ½ cup whole milk
  • ¼ cup all-purpose flour
  • 2 T unsalted butter
  • ¼ cup diced tomatoes with green chilies
  • ¾ cup mexican shredded cheese
  • salt and pepper to taste
Instructions
  1. Slice and seed jalapenos.
  2. Place them cut side down on a baking sheet.
  3. Roast at 400 for 15 minutes
  4. Chop onion and carrots.
  5. Saute in olive oil over medium heat (in a dutch oven) for about 4 minutes.
  6. Add roasted jalapenos (chop them) and garlic powder
  7. Add in butter and as it melts, stir in the flour.
  8. Once combined, add in chicken broth.
  9. Bring to a simmer.
  10. Add in milk and simmer for another 3-5 minutes
  11. Transfer to a blender to puree (or use immersion blender.
  12. Put back in dutch oven.
  13. Add tomatoes and cheese and heat through until cheese is melted.
  14. Top your bowl of soup with more tomatoes, cheese, avocado slices, bacon.
  15. Enjoy
 

Triple B Mac & Cheese

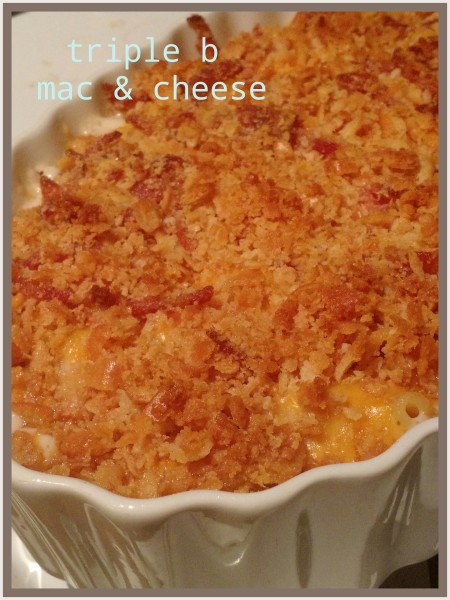
Triple B Macaroni and Cheese

BBQ.  Everyone has their opinions of it, especially in the South.  Vinegar?  Brown sugar?  Mustard? Smoked with sauce?  Smoked with sauce on the side?  Pork?  Beef?  Never-ending discussion on this subject.

I do like some BBQ better than others but one of the best parts about bbq is the side dishes that accompany it.  And this new macaroni and cheese would own up to the best bbq at any picnic table – especially this weekend, as it is the official last weekend of summer and many tailgating parties are happening as well.

Triple B Mac & Cheese
Author: 
Recipe type: casserole
Cuisine: southern
Prep time: 
Cook time: 
Total time: 
Serves: 4-6
 
The perfect side dish to any bbq - or just a main dish waiting to be devoured
Ingredients
  • 8 oz shell pasta
  • 6 T unsalted butter
  • ⅓ cup all-purpose flour
  • ½ tsp kosher salt
  • ½ tsp ground black pepper
  • 2 tsp country dijon mustard
  • 1 cup chicken broth
  • 1½ cup heavy whipping cream
  • 2 cups shredded monterey jack cheese
  • 1 cup shredded sharp cheddar cheese
  • ⅓ cup diced banana peppers
  • 3 strips bacon (already cooked, diced)
  • ¾ sleeve Ritz crackers
  • 2 T unsalted butter, melted
Instructions
  1. Boil water for pasta and cook the pasta according to directions, drain.
  2. Melt down butter in a pan.
  3. Once butter is melted add flour and salt. Whisk until combined.
  4. Add pepper and dijon mustard and mix well
  5. Add cream and stock and whisk for about 3 minutes
  6. Add monterey jack cheese and turn off the heat.
  7. Dump in the cooked pasta.
  8. Pour all into a buttered casserole dish.
  9. Top with grated sharp cheddar.
  10. Mix melted butter, crushed crackers, and diced cooked bacon. Sprinkle on top
  11. Bake for 20 minutes at 400.
  12. EAT!
Triple B: bacon, banana peppers, and baked.  Creamy.  You can’t go wrong.

Lemon Cardamom Shortbread Cookies

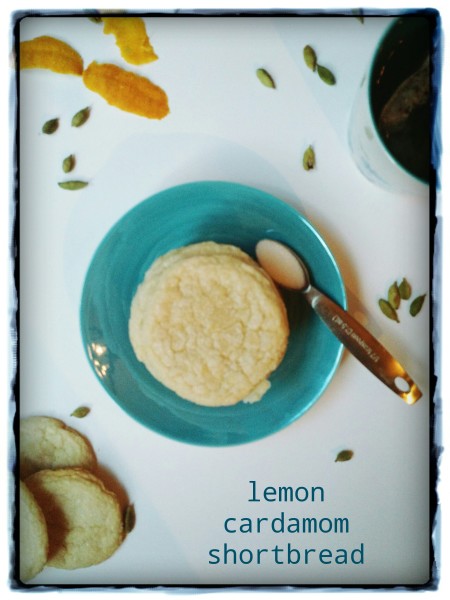
Lemon Cardamom Shortbread

Cardamom is definitely my favorite go-to spice with anything berries or citrus.  It just lends that special “oomph” and “hmmm, wonder what is in there” to any recipe.  I have made some cardamom sugar with the pods and always have ground cardamom in my spice “basket” (a wine box I found at Goodwill which I love and am always in search of another one for cheap).

Anyway, I had to share this recipe tonight!  Just in case you have tons of lemons and you just have to have cookies with your decaf tonight!

This recipe is a shout out to Cheryl Day who owns Back in the Day Bakery – my fave cafe in my favorite city in Georgia, Savannah.  I tweaked her recipe and oh by golly is it good (and her’s is stellar too by the way).

Lemon Cardamom Shortbread Cookies
Author: 
Recipe type: Cookies
Cuisine: Dessert
Prep time: 
Cook time: 
Total time: 
Serves: 3 dozen
 
Perfect chewy shortbread for that cup of coffee!
Ingredients
  • 2 sticks unsalted butter, softened
  • 1½ tsp lemon extract (I love opening the bottle of this, smells amazing)
  • ¼ tsp sea salt
  • 1¼ cup 10x sugar
  • 2 cups all-purpose flour
  • zest of two lemons
  • ⅛-1/4 cup cardamom sugar (for sprinkling on top before baking)
Instructions
  1. Heat oven to 350.
  2. Spray sheet pans with baking spray.
  3. Cream butter. Add in salt and lemon. Combine sugar and zest. Then add in all purpose flour. Shape into balls with your hands and gently press them down (I'd love to find a pretty cookie press for this one, a simple, antique one would be great).
  4. Let chill in fridge for 2 hours.
  5. Sprinkle cardamom sugar on top of each cookie.
  6. Bake at 350 for about 10 minutes.
  7. Cool a little - then devour them warm, or wait until morning.