Kids and Summer – and Peanut Butter Bars

Easy Peanut Butter Bars

About a month ago, I was so concerned with what I was going to do since summer was coming.  See, my older little boy is in preschool and it was letting out for 2 months.  It is hard to take two preschoolers with me anywhere, and I had grown accustomed to getting things done in the morning with just one of them.

And here, almost July, and we have one more month. A month filled with fruit picking, zoo trips, play dates, and vacation to North Carolina.  It hasn’t been as tough as I thought, but my husband has been gracious with his time off, too.

At the beginning of the week I wanted to bake something and get my older preschooler in the kitchen.  He really loves being in the kitchen with me and I love it.  So, we opened a cookbook, made a few tweaks with what we had, and put them in the oven.

The next day we got to head to Roswell and go hiking and playing in the water at Vickery Creek Falls.  So fun.  My boys are definitely water lovers and they love any time they get to spend with their daddy.  These bars were delicious and portable and had some good energy boosting carbs in them to refuel them after the hike.

Easy Peanut Butter Bars
Author: 
Recipe type: Bar
Cuisine: Dessert
Prep time: 
Cook time: 
Total time: 
Serves: 20
 
Easy, portable, not-to-sweet peanut butter bar
Ingredients
  • ½ cup unsalted butter, softened
  • ½ cup sugar
  • ½ cup packed brown sugar
  • 1 egg (room temp)
  • 1 tsp vanilla
  • 1 cup all-purpose flour
  • ¼ tsp kosher salt
  • ½ cup rolled oats
  • ½ cup roasted peanuts (halved)
  • ¾ cup chocolate chunks (I used dark)
  • ½ cup 10x sugar
  • 1½ T creamy peanut butter
  • 2 T milk (or until desired glaze consistency)
Instructions
  1. Cream first ingredients (through vanilla).
  2. While you let the mixer do its work, get a 9x13 pan, line with foil, spray with cooking spray, and set oven to 350.
  3. Combine dry ingredients and mix with sugar mixture.
  4. Fold in chips and nuts.
  5. Press into pan and bake for 20-25 minutes.
  6. When done, let cool in pan for 5-10 minutes.
  7. Take the bars out (made easier with the help of the foil) and put on cooling rack.
  8. Mix glaze and drizzle over the bars.
  9. Let cool completely then cut into squares.
These were easy to assemble and tasted great and have lasted well throughout the week.

Generations, Cupcakes, and Gigi’s

posted in: chocolate, food | 0

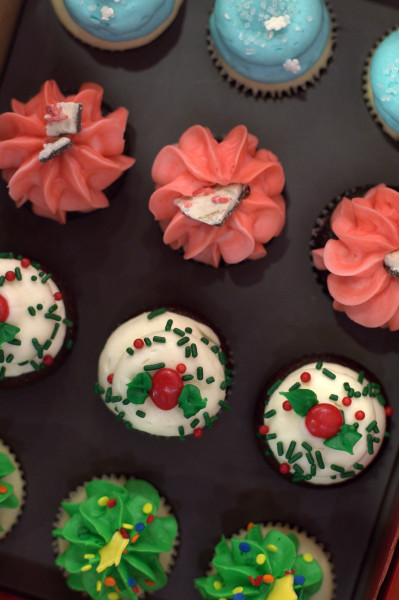
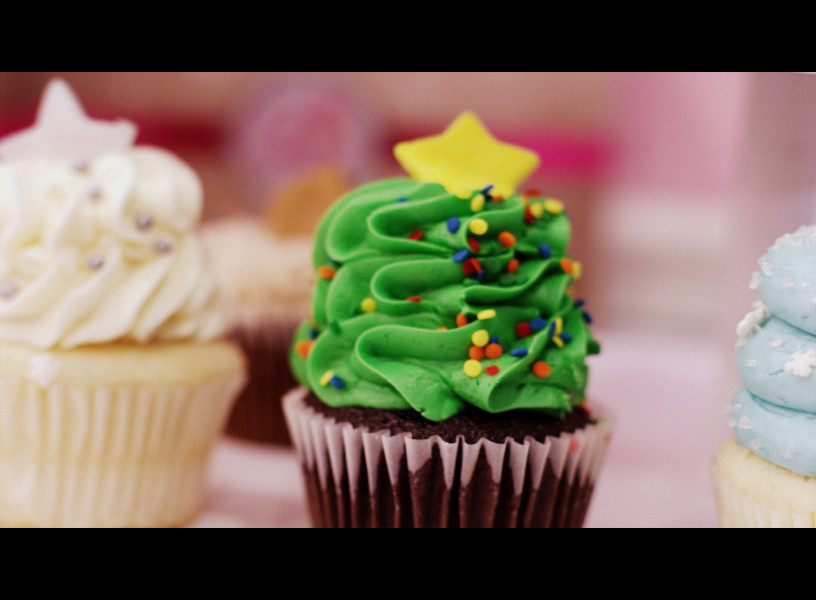
Gigi's Holiday Cupcakes

There is something about the generations sitting down for a meal – or tossing flour in the kitchen as they make baked treats, or picking oranges from the groves around home.  Heritage and generations tell something of history and the future.  Hearing how Gigi’s got started about a decade ago – made me love the cupcake brand even more (the amazing Pecan Pie may have influenced my admiration).  I love how she is carrying recipes from generations ago and giving it to people (like me, and my littles) to carry on the yumminess to new generations.

My grandmother got me started on Little Debbie’s Nutty Bars. Every time I see them in the store or dare to buy a box I think of her.  I don’t remember her baking a lot but I remember her chicken and rice, french fries, and dressing at Thanksgiving.  My Papa (her husband) taught me how to fish, make french fries, and eat (and pick) oranges.  I’ve learned my parents’ favorite recipes and I look forward to encouraging my boys to love the kitchen (and cupcakes).  When I shared one of the mini cupcakes with my younger son this morning, he quickly licked off all the powder blue buttercream.  A dude after his momma’s heart!

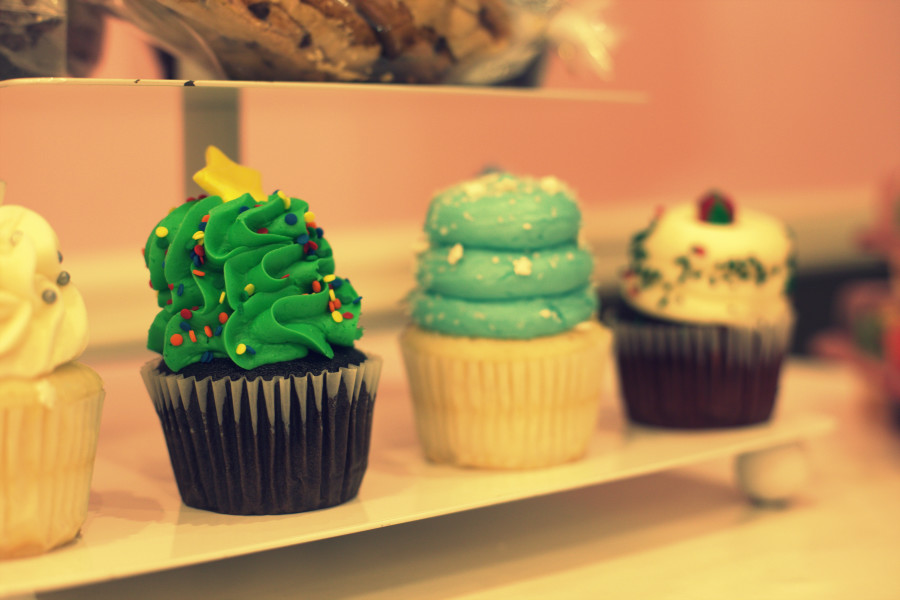
Holiday Minis

Last night I had the opportunity to head to Gigi’s Kennesaw (just north of ATL) and taste their scrumptious desserts – including pies, cheesecakes, stuffed cookies, truffles, and cupcakes (and their new gluten-free line).  It was a fun evening, warm and toasty (even though it was raining outside) with other bloggers in the area and the owner of Gigi’s who as a gracious host.  We got to eat until we were full, and laugh, and just hang out.  It was a great evening.

One of our had tasks we had while we were there was to test out the new #gfreegigis line of cupcakes.  Even though Gigi’s cant be considered Gluten Free because they bake with gluten in the building – they go through great lengths to make sure the gluten stays far away from these cupcakes.  They want to take care of their customers – both gluten free customers and ones that aren’t.  The normal cupcake eater is not going to be able to tell the difference in taste.  Most of us even couldn’t.  The only thing I could tell was a slight chewiness in texture with the gluten-free – because of the rice flour and tapioca flour blend they use in the baking.  But, it was so delicious.  And the best thing is that gluten free doesn’t have to mean you can’t have cupcakes.  And there is no upcharge like most bakeries and grocery store items.  These gluten free cupcakes are the same price!

All the cupcakes!

And if you just need something to eat besides a cupcake: the peanut butter stuffed cookie was my salty goodness for the evening and like I’ve raved about before – the Southern Comfort pecan pie melted this southern girl’s heart (and taste buds)!

Thanks so much Gigi’s Kennesaw!  Y’all definitely pleased my taste buds last night!

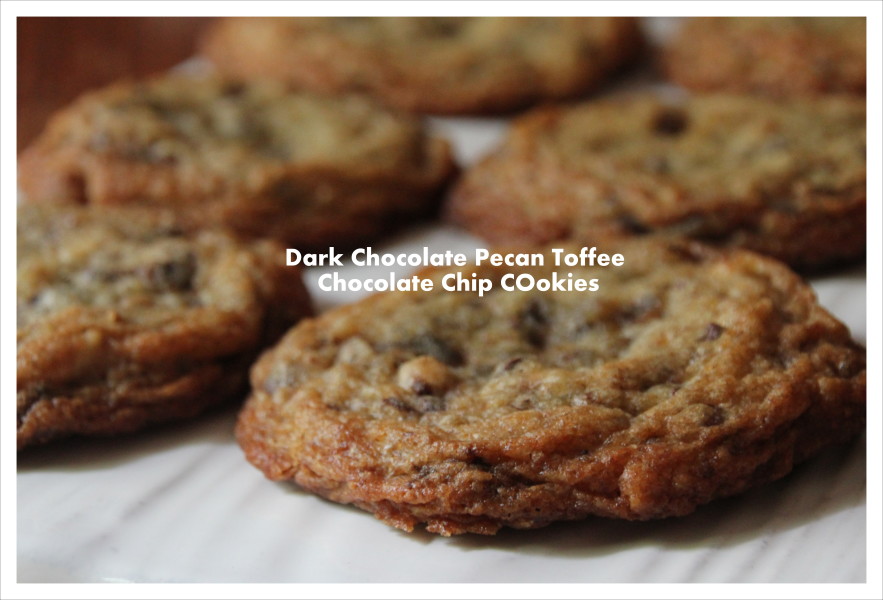
Dark Chocolate Pecan Toffee Chocolate Chip Cookies

Dark Chocolate Pecan Toffee Chocolate Chip Cookies

I didn’t grow up on homemade cookies.  The closest we got were a couple of Christmas goodies I remember my Mom training me to bake and Publix cookies.  Oreos were always my favorite and of course I was a Girl Scout so the peanut butter sandwich cookies were my favorite thin – now, it is the Thin Mints, hands down.

But, now, sometimes, I wake up thinking about chocolate chip cookies.  Who knows?  But, I woke up this morning thinking about cookies.  It was raining.  I have boys.  Friends were coming over.  No time to go to the store.  This is how these amazing cookies started.

A new friend gave me some toffee on a recent trip to the Triangle.  I had mini chips in the freezer.  My mom always stocks my pantry full of pecans, and I had bars of chocolate in my baking stash.

These are the perfect chewy consistency.  Nice and big but not too flat.  I tweaked a recipe and it turned out great.  I hope you enjoy!

Chewy Cookies

Dark Chocolate Pecan Toffee Chocolate Chip Cookies
Author: 
Recipe type: Dessert
Cuisine: Cookies
Prep time: 
Cook time: 
Total time: 
Serves: 24-30
 
These chewy chunky toffee cookies will be a crowd pleaser!
Ingredients
  • 2 cups all purpose flour
  • ¾ tsp sea salt
  • ¾ tsp baking soda
  • 2 sticks unsalted butter, softened
  • 1 cup sugar
  • ⅔ cup packed light brown sugar
  • 2 tsp vanilla
  • 2 eggs
  • Half cup each:
  • chopped toffee
  • mini semi-sweet chocolate chips
  • chopped milk chocolate
  • 1 cup chopped pecans
Instructions
  1. Preheat oven to 375. Lightly spray baking sheets.
  2. Combine dry ingredients and set aside.
  3. Cream together the butter and the sugars.
  4. Add eggs and vanilla.
  5. Add in the dry ingredients and stir together.
  6. Fold in the add-ins.
  7. Do not over mix
  8. I got 6 cookies per baking sheet - so these are pretty generous cookies.
  9. Bake for 12 minutes.
  10. Do not over bake.
  11. Let cool for 1-2 minutes and remove to a cooling rack. If you let them stay on the baking sheets, the toffee will stick to the pan.
 

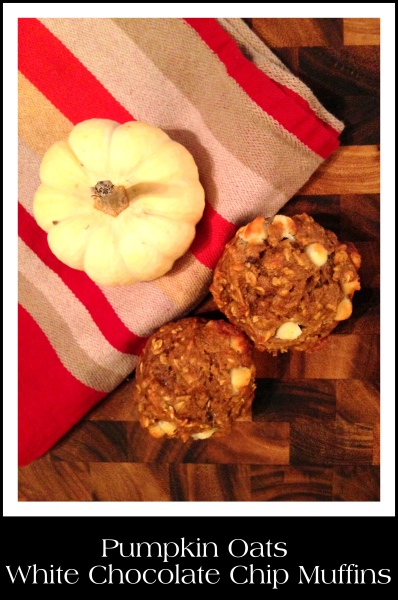
Pumpkin Oats White Chocolate Chip Muffins

Pumpkin Muffins

Pumpkin overload – right?  Pumpkins are everywhere, even now that Halloween is past and we are moving headlong into the Thanksgiving season.

Do you know what my favorite Thanksgiving commercials are – ever – the Publix pilgrim little figurines – that get so full from all the Publix food that was served on Thanksgiving that their outfits tend to pop buttons.  So fun.  Growing up in Lakeland, FL – the home of Publix – I saw my share of Publix commercials – and am so glad to be living again with a Publix on every corner.

Anyway, back to pumpkins.  As a Mom, sometimes I stress about my kids’ nutrition.  I mean my older son could down all the fruit he could ever eat if I let him.  My younger son loves those little pouches that are fruit-filled.  We have instituted a donut morning one day every week, and I usually bake something sweet, and we eat out just to make life easier.  So, I’m not the healthiest Mom out there – but that isn’t the end all either. They love their fruits and veggies so that is great!  And neither of them really dig french fries – so that’s a plus!

These muffins – both of them are gobbling up.  I feel good about giving them one because there is no added fat in it from butter or oil – so that makes them healthier, right?  And, they are very yummy!  You can change up the add-ins for the muffins, and this time I had a small amount of white chocolate chips left – they are a very nice addition.

Pumpkin Oats White Chocolate Chip Muffins
Author: 
Recipe type: Muffins
Cuisine: Bread
Prep time: 
Cook time: 
Total time: 
Serves: 12
 
A healthy hearty filling pumpkin muffin with a touch of sweetness
Ingredients
  • 1 cup rolled oats
  • 1 cup all-purpose flour
  • ½ cup packed brown sugar
  • 1¼ cup Pumpkin Pie Mix in a can
  • 1 egg
  • 1 T applesauce
  • 1 tsp baking powder
  • ½ tsp baking soda
  • ¾ tsp cinnamon
  • ⅓ cup white chocolate chips
Instructions
  1. Mix all the ingredients together.
  2. Spray muffin tin (makes 12 muffins) and set oven on 375
  3. Fill each muffin cup about ¾ full with muffin batter.
  4. Bake for about 20 minutes or until done, don't overbake
 

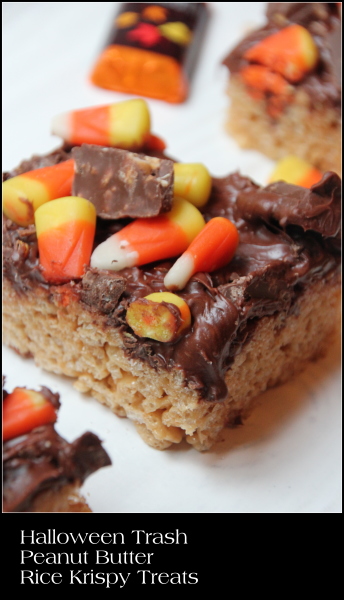
Halloween Trash Peanut Butter Rice Krispy Treats

Halloween Trash Peanut Butter Rice Krispy Treats

Now that Halloween is over and a new month is upon us, must of us are gearing up for the other two big holidays – Thanksgiving and Christmas.  Let the baking season begin (or, um, continue).

Some people wonder what inspires me to cook what I do.  One of the ways is by following great foodie people on Instagram.  That’s how these came about.  One of the best places in Savannah is Back in the Day Bakery. Cheryl Day, co-owner and baker, featured a chocolate covered rice krispy treat yesterday in her feed.

How to Use Leftover Halloween Candy

Well, I thought I would just run to target with my littles and get the ingredients.  Little did I know that it would be the worst Target run ever.  In front of our local Target store, the city has been demolishing a building.  The backhoes and front loaders and bulldozers are in full force.  Yes, I’m a mom to two little toddler boys!  My older one is mesmerized by their action.  So, cue drama and meltdown as I pushed the boy-filled cart toward the Target entrance, away from the construction site.  Then, I get in there and finally am able to calm him down, when my younger one who is usually happy as a clam in a store, completely screams his head off for 20 minutes while I’m in the store.  He was teething.  But, I couldn’t find the marshmallows.  I had everything else.  Finally just put everything back on the shelves and walked out.  Forget making dessert.

Well, later that afternoon I decided I still wanted to make them and we tried again.  This time at our local Publix.  No construction site.  Employees with candy and balloons.  They were happy. Momma was happy.

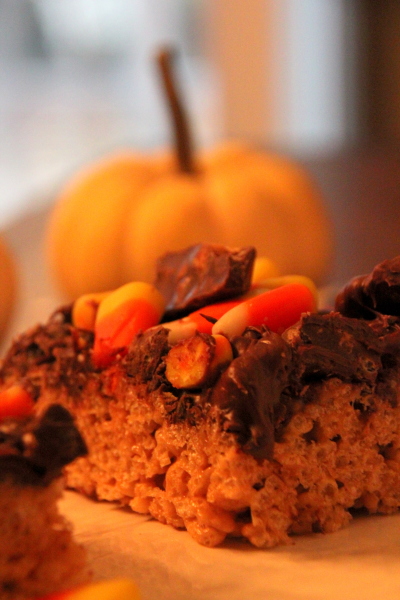
Thankfully, these were made.  I’m not usually a fan of milk chocolate anything, but I’m glad I went with the milk chocolate frosting as it was just perfect paired with the peanut butter in the rice krispy treat.

This is a perfect way to use up all of your leftover Halloween candy – or give you a perfect excuse to go buy more!

Halloween Trash Peanut Butter Rice Krispy Treats
Author: 
Recipe type: Dessert
Cuisine: Sweets
Prep time: 
Cook time: 
Total time: 
Serves: 12
 
Perfect use for all of your leftover Halloween candy
Ingredients
  • 1 T unsalted butter
  • 3 T creamy peanut butter
  • 1 pinch kosher salt
  • 1 bag mini marshmallows
  • ½ tsp vanilla extract
  • 6 cups crisped rice cereal
  • 1 container milk chocolate with chocolate chips frosting
  • leftover halloween candy
Instructions
  1. Grease a 9x13 pan
  2. In large pot, melt together the butter and peanut butter.
  3. Add salt and stir.
  4. Add marshmallows and stir until melted.
  5. Add in vanilla.
  6. Set pot off the heat.
  7. Stir in cereal.
  8. Press into 9x13 pan by using a piece of parchment paper so the mixture won't stick to your hands.
  9. Let cool.
  10. Frost with frosting.
  11. Immediately top with leftover crushed Halloween candy.
  12. Let sit to harden.
  13. Enjoy!


Pumpkin Butter Whole Wheat Millet Muffins

Pumpkin Butter Muffins

Fall – I think for a lot of us kitchen people its one of our favorite seasons.  Pumpkin.  Cinnamon.  Sweet Potatoes.  Apples.

But, I don’t think I had ever experienced a Fall season until I moved to North Carolina in 2000.  See, I grew up in central Florida.  The only two seasons we had were Summer and Christmas Day (and some years we only had one season).  I loved it.  I was close to Disney World though I only remember going in high school and college when I would do Night of Joy with the youth groups.  I was close to the beach (though we had a pool, so my Dad couldn’t figure out why we needed to spend money going to the beach).

But, I remember moving to Wake Forest, North Carolina to start seminary right before a huge snow storm – rethinking the whole moving north thing.  But, then fall came around at the start of my second semester.  I adored the sound the leaves made as I walked through them on my way to class.  I loved wearing jackets with my jeans (even though I would sport some flipflops usually).  I loved sitting down with a warm cup of chai or steamed milk or hot chocolate to study out on the lawn.  The bright blue Fall sky against the browns and yellows and reds of the leaves.  Gorgeous.

IMG_1318

And of course, Fall brings pumpkin!  I could eat pumpkin goodies year round, but yesterday when I stepped outside for an early morning out, and felt the slightly cooler Atlanta air, I knew I was ready for Fall.  So, I whipped up these pumpkin butter muffins for my mister.  They were a winner. (This recipe was inspired by Joy the Baker)

Pumpkin Butter Whole Wheat Millet Muffins
Author: 
Recipe type: Muffins
Cuisine: Breakfast
Prep time: 
Cook time: 
Total time: 
Serves: 10
 
Hearty and healthy muffins, of course with some chocolate. Perfect for Fall mornings or evenings!
Ingredients
  • ½ cup vegetable oil
  • ¾ cup packed light brown sugar
  • 2 eggs
  • 1 jar (10 oz) pumpkin butter (I used Trader Joe's)
  • 2 tsp vanilla extract
  • 1¾ cup whole wheat flour
  • ½ tsp salt
  • 1 tsp baking soda
  • ½ cup dry millet (I found in bulk aisle at Whole Foods)
  • ¾ cup mini semi-sweet chocolate chips
  • ¼ cup milk
  • juice of ½ lemon
Instructions
  1. Preheat oven to 350
  2. Grease or line 10 muffin cups
  3. Mix wet ingredients (up through vanilla)
  4. Combine dry and add to the wet mixture
  5. Mix the milk and the lemon juice then add to muffin mixture.
  6. Fold in chocolate chips.
  7. Spoon into muffins tins.
  8. Bake for about 19 minutes or until muffins are done.
  9. Cool and eat. My husband ate one topped w some raw honey this morning.
IMG_1320

Sundays in the South

Smores Pie

It is just starting to drizzle here in the ATL metro area.  I love it when it rains here.  We’ve had several days this week of thunder and lightning and pouring down rain.  I’ve loved it.

Our older son loves to stand at his window and look out at the rain and explain “whoa” or “wow” or “oh” every 10 seconds.  He must be fascinated at the creation of God.  I love how God is so in charge of the weather!  Every rain drop falls at his bidding.  Amazing.

And, in God’s amazingness – He gives us chocolate and marshmallows and heavy whipping cream.

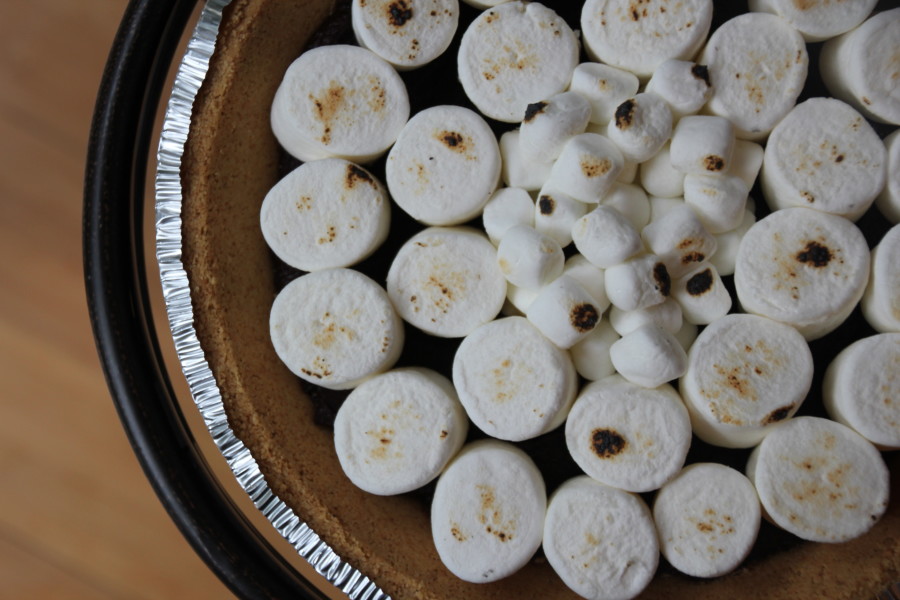
For pies such as the one you see up top.

Happy Sunday!

No Bake Fudge S’mores Pie

National Smores Day

Don’t you love how life teaches you lessons?  We all have days where we learn valuable lessons that will profit us to use them in the future.

Like don’t go out without an umbrella if skies are threatening rain.

Don’t date guys who don’t love Jesus first and foremost.

Always wear the same shoes – vital.

Love above all else.

When you get hurt (and you will), don’t hurt in return because it doesn’t do anyone any good.

Leave your heart open for new relationships and friendships.

And this S’mores Pie.

No Bake Fudge Smores Pie

I found out on Instagram yesterday that today is National S’mores Day (who is in charge of making these things up, anyway?).  So, all I had to do was get a few things from the store and this pie is all set for when we get home from church tonight.  It is dark, fudge, not too sweet, and topped with fluffy, sugary goodness.  Slightly burnt edges – just like the perfect campfire marshmallow before you smush it between some chocolate and graham crackers.

The lesson I learned in making this pie?  Buy a culinary torch.  It will just do you wonders and save bunches of time (because my life as a full-time mommy comes first to my adventures in The Charming South Kitchen, so I’ve gotta use those nap times wisely).  At least I was able to sip on my McDonald’s diet coke while I was waiting for my lighter to slightly burn the edges of the marshmallows.  (I adapted this recipe from Brown Eyed Baker)

No Bake Fudge S'mores Pie
Author: 
Recipe type: Dessert
Cuisine: Pie
Prep time: 
Total time: 
Serves: 8-10
 
No need for a campfire or an oven for this pie. Chocolate, graham crackers and marshmallows.
Ingredients
  • 1 graham cracker crust, chilled
  • 6 oz bittersweet chocolate
  • 2 oz dark chocolate
  • ⅓ cup plus 1 T heavy whipping cream
  • 1¾ teaspoon light corn syrup
  • 3 T unsalted butter
  • ¾ bag large marshmallows
  • handful mini marshmallows
Instructions
  1. Heat the cream and light corn syrup on stove until slightly boiling (you don't want to overheat it because it will burn).
  2. Pour the heated cream mixture over the chocolate and stir until smooth.
  3. Add the butter and stir until creamy.
  4. Gently spread the chocolate mixture in the bottom of the graham cracker pie crust
  5. Place the marshmallows on top, gently pressing them into the fudge filling.
  6. Heat with a torch or match or however you want to light them, to the crispiness of your liking.
  7. Let come to room temp before serving
  8. Cut slices and serve.
 

Marshmallows


Mini Nutella Cupcakes with Nutella Buttercream

posted in: chocolate | 0

World Nutella Day.  Isn’t it a great day!

Just in time for the Super Bowl too – so I could have a reason to make these wonderful bites of deliciousness and not eat them all.

Enjoy.

I searched the internet, then combined a couple of recipes.

1/2 cup self-rising flour

1/4 teaspoon salt

2 tablespoons unsalted butter, softened

1/2 tsp vanilla

1/4 teaspoon almond 

1/4 cup sugar

8 ounces Nutella –

2 large eggs

2 tablespoons skim milk

Cream eggs and butter and extracts, add in nutella.  Scrape sides.  Add in dry ingredients, alternating with the milk.  Mix until you get a smooth consistency. 

I used mini cupcakes liners – makes about 30-36.  Fill no more than half way.  Spray liners of course.  Bake at 325 for about 15 minutes, don’t overcook these babies.

Frosting:

1 1/2 sticks unsalted butter, softened

1/2 cup Nutella, mine was pretty heaping of a 1/2 cup

3/4 tsp vanilla

1 Tbs skim milk

1 cup sifted powdered sugar

Mix butter and nutella.  Then vanilla and milk – finish with sugar. 

Don’t eat it all before you get it on the cupcake.

Taste of Durham: Amelia Cafe

In the middle of the Brightleaf Square corridor sits a little cafe that serves desserts and real food.

I spend 4 hours there on Sunday, taking pictures, talking w a dear friend, and sipping on an espresso macchiato. 

The cake we chose was moist, texture-perfect, and delicious.  I could have easily eaten the entire cylindrical – goodness, but I shared, like a good girl.  We chose the coconut tres leche cake and the toasted coconut on the outside was supreme.  The filling of the tres leche cake was rich and pale yellow taste-bud delight with every bite. 

They serve many other beautiful creations and then have a full menu as well.  You can sit there for hours and have no one bother you.  And they have refills on their coffee – serve your own.  So, I’ll definitely be heading back there, especially when it gets warmer and I can sit outside.

Finds like Amelia’s are what makes Durham a great place to eat!

Only negative: their photos both on their website and menu need help.  Hey folks at Amelia’s: I’m available.  Contact me!